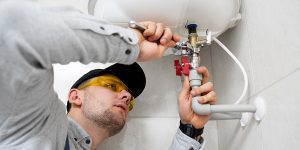

Getting a water heater installed by a professional, whether gas or electric, guarantees the equipment operates safely and efficiently. Herdman Plumbing understands the significance of a water heater installation and offers a checklist to guarantee the installation is completed correctly. This blog post walks through the phases of our water heater installation checklist and discusses the benefits of following it.
Water Heater Pre-Installation Checklist
1. Choosing the Best Water Heater
Factors like size, fuel type, and efficiency should be considered before buying a water heater. Consider these factors to understand the best water heater that can suit all your needs. Herdman Plumbing helps customers choose the best water heater for their unique needs and budget.
2. Determine the Appropriate Water Heater Size
The size of the water heater is determined by the number of individuals living in the house and the amount of hot water used. A small water heater will not provide sufficient hot water, whereas a large water heater might waste electricity.
3. Measure the Installation Area
It is necessary to measure the installation space as it should be large enough to house the water heater, maintenance, and repairs.
Water Heater Installation Checklist
The real installation process can begin once the pre-installation checklist is done. Herdman Plumbing employs a step-by-step procedure to ensure the installation is completed appropriately.
1. Shut off the Power and Water Supply
Turning off the electricity and water supply is the first step to installing a water heater. It ensures that no electricity or water flows through the unit while it is installed.
2. Drain the Old Water Heater
The next step is to drain the old water heater completely. It is critical because it keeps water from leaking throughout the installation procedure.
3. Disconnect the Old Water Heater
After the old water heater has been drained, it must be disconnected. It entails cutting off the water and gas/electricity supply lines.
4. Set up the New Water Heater
The new water heater can now be put in its right place. It should be level and secure to avoid toppling over.
5. Connect the Water Supply to the Gas/Electricity Supplies.
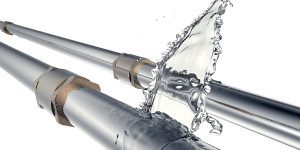
The water and gas/electricity supply lines must be connected after installing the new water heater. These water heater connections must be safe and free of leaks.
6. Examine the Installation
The last stage in the process is to examine the installation. Our professional team inspects the installation for leaks or weak connections and ensures it runs.
Water Heater Post- Installation Checklist
Following the installation of the water heater, several post-installation tasks must be taken care of to ensure that it functions properly.
1. Turn on the Water Supply and the Gas/Electricity Supplies.
Turn on the water heater’s water and gas/electricity supplies. It guarantees that the device is fully charged and ready for usage.
2. Inspect the Water Heater
To test the water heater’s functionality, turn on the hot water and observe for any leaks or unusual noises while the water quickly heats up.
3. Adjust the Temperature
It is recommended to set the water heater’s temperature to the desired level, which is typically between 120 to 140 degrees Fahrenheit for most households.
4. Examine the Installation Again
Re-inspecting the installation of the water heater is crucial after testing and adjusting the temperature. This step ensures that all components are properly functioning and that no leaks or loose connections are present.
Maintenance Tips for Water Heater
Frequent maintenance is required to ensure that the water heater functions efficiently and lasts as long as feasible. Some critical water heater maintenance ideas include:
1. Regular Maintenance to Extend the Life of the Water Heater
Regular maintenance for the water heater includes flushing the tank to remove the sediment buildup, inspecting the unit for leaks, and checking the temperature and pressure relief valves.
2. Keeping the Water Heater Clean
Clearing any debris or leaks from the water heater tank is important to ensure that the unit functions efficiently and is not damaged.
3. Replacing Anode Rod
Replacing the anode rod is crucial to prevent corrosion and maintain the water heater’s functionality. Our team of experts can guide you in determining when the anode rod needs to be replaced and perform the replacement service for you.
4. Hire a Professional Inspection
Getting your water heater professionally inspected is important to ensure its proper functioning. Our team can inspect your water heater and carry out any required repairs or replacements.
Conclusion
Herdman Plumbing understands the significance of a hot water heater installation and the requirement for adequate maintenance to guarantee that the unit operates properly and lasts longer. Our detailed water heater installation checklist assures proper installation, and our skilled staff performs regular maintenance and inspections to keep your water heater in great condition.
Contact Herdman Plumbing if you need a water heater installed or serviced in Belfair, Bainbridge Island, Bremerton, Port Orchard, Poulsbo, or Silverdale. Our skilled team will gladly assist you and ensure your water heater operates efficiently and safely.